最近在学习Django,把自己学习的一些内容记录下来,方便学习,这边主要学习的是官方网站的入门教程。
开发前准备
环境准备主要是安装Python和PostgreSQL,这里不做详细的介绍。目前使用的Python版本为3.6.1。然后安装Django包和PostgreSQL的数据库连接数据包。安装也非常的简单:
pip install django
pip install psycopg2
这里使用的是Django最新的2.0.1版本。由于目前主要用来学习,所以没有使用到virtualenv。
建立项目和应用
在安装完成后将就需要建立项目和应用,需要注意的是在Python中项目和应用是归属的关系,即应用属于项目,在建立应用前先要建立项目。
建立项目
建立项目前需要将控制台命令所在的目录转到你想建立的目录,然后运行:
django-admin startproject mysite
在运行完成后,会在当前目录下生成如下文件:
mysite/ #这个目录只是项目的一个容器。它的命名对Django无关紧要,你可以把它重命名成你喜欢的任何名字。
manage.py #一个实用的命令行工具,可让你以各种方式与该Django项目进行交互。
mysite/ #项目真正的Python包。它是你导入任何东西时将需要使用的Python包的名字(例如 import mysite.urls)。
__init__.py #一个空文件,它告诉Python这个目录应该被看做一个Python包。
settings.py #Django项目的设置/配置文件
urls.py #该Django项目的URL声明;一份由Django驱动的网站"目录"。
wsgi.py #一个WSGI兼容的Web服务器的入口,以便运行你的项目。
在这里我们先对如下内容,不进行深究:
在后文中再来讲解settings.py和urls.py。
建立应用
在执行完完上述命令后,将目录转到mysite目录下,执行建立应用的命令:
cd mysite
python manage.py startapp polls
在执行完上诉命令后,会在mysite目录下生成如下文件:
polls/ #应用的包名
__init__.py ##一个空文件,它告诉Python这个目录应该被看做一个Python包。
admin.py #管理站点模型声明文件,默认为空,可以利用它来建立一个管理后台。
apps.py #应用信息定义文件。在其中生成了类AppConfig,该类用于定义应用名等Meta数据。
migrations/ #用于之后定义引用迁移功能。
__init__.py ##一个空文件,它告诉Python这个目录应该被看做一个Python包。
models.py #添加模型层数据类的文件。
tests.py #编写单元测试的文件。
views.py #定义URL响应函数。
至此应用创建完毕。
配置项目
配置项目的核心是修稿settings.py文件。
数据库连接配置
这里选择的是PostgreSQL,所以将文件中的数据库设置修改为:
DATABASES = {
'default': {
'ENGINE': 'django.db.backends.postgresql',
'NAME': "djangotutorial",
'USER': 'postgres',
'PASSWORD': 'postgres',
'HOST': '127.0.0.1',
'PORT': '5432',
}
}
注意:库名需要在数据库中新创建好
其他类型数据库配置参见:https://docs.djangoproject.com/en/2.0/ref/settings/#databases
语言和时区设置
具体配置如下:
LANGUAGE_CODE = 'zh-hans'
USE_TZ = True #时间格式启用时区
TIME_ZONE = 'Asia/Shanghai'

USE_I18N = True #指定Django的翻译系统是否被启用。
USE_L10N = True #用于决定是否默认进行日期格式本地化。如果此设置为True,例如Django将使用当前语言环境的格式显示数字和日期。
注意事项:
- 语言设置时,使用的的是zh-hans,而不是zh-CN,这个和HTML中的语言设置也一样,这里遵照的是IOS639规则。
- 设置TIME_ZONE需要将’UTC’改为’Asia/Shanghai’,否则会出现界面呈现时的时间比当前时间小8小时。
新增应用
INSTALLED_APPS = [
'polls.apps.PollsConfig', #新增记录
'django.contrib.admin',
'django.contrib.auth',
'django.contrib.contenttypes',
'django.contrib.sessions',
'django.contrib.messages',
'django.contrib.staticfiles',
]
在安装的APPS中新增如上的记录。
创建第一个视图
定义视图
打开polls/views.py,修改内容为:
from django.http import HttpResponse

def index(request):
return HttpResponse("Hello, world. You're at the polls index.")
URL配置
将URL配置下放给每个应用,应用与应用这边的URL配置相互独立,这样更加有利于维护。通过include方法引用应用下的URL配置文件。打开mysite/urls.py,将内容设置如下:
from django.urls import include, path
from django.contrib import admin

urlpatterns = [
    path('polls/', include('polls.urls')),
    path('admin/', admin.site.urls),
]
设置URL和视图绑定关系
将URL规则与试图进行绑定,这里通过给urlpatterns添加path实现。在polls文件夹下新建urls.py,文件内容为:
from django.urls import path
from . import views

urlpatterns = [
    path('', views.index, name='index'),
]
运行查看效果
通过内置服务器运行查看效果,运行如下指令开启内置服务器:python manage.py runserver
然后通过http://127.0.0.1:8000/polls/即可查看到返回的视图信息。
注意:内部服务器仅供测试使用,对外发布最好使用wgsi的模式,这里不做深入研究。
创建第一个模型
创建模型
打开polls/models.py文件,将文件内容更新为:
from django.db import models

class Question(models.Model):
    question_text = models.CharField(max_length=200)
    pub_date = models.DateTimeField('date published')

class Choice(models.Model):
    question = models.ForeignKey(Question, on_delete=models.CASCADE)
    choice_text = models.CharField(max_length=200)
    votes = models.IntegerField(default=0)
投票的模型比较简单,主要是问题和选项,中间要特别注意问题和选项的一对多关系的设置。
由于模型中的涉及到字段、关系、设置等,比较复杂,这里先不做详细阐述,后续进行单独的介绍。
生成数据库表
Django的一个强大之处是在创建完模型后可以直接生成数据库表,执行:
python manage.py makemigrations polls
可以看到类似的内容:
Migrations for 'polls':
  polls/migrations/0001_initial.py:
    - Create model Choice
    - Create model Question
    - Add field question to choice
上面的语句并没有直接创建表,而是生成了创建表的语句,polls/migrations/0001_initial.py中生成的是迁移的一些操作。可通过如下指明查看具体的执行SQL是怎样的:
python manage.py sqlmigrate polls 0001
正常情况下会返回如下信息:
BEGIN;
--
-- Create model Choice
--
CREATE TABLE "polls_choice" ("id" serial NOT NULL PRIMARY KEY, "choice_text" varchar(200) NOT NULL, "votes" integer NOT NULL);
--
-- Create model Question
--
CREATE TABLE "polls_question" ("id" serial NOT NULL PRIMARY KEY, "question_text" varchar(200) NOT NULL, "pub_date" timestamp with time zone NOT NULL);
--
-- Add field question to choice
--
ALTER TABLE "polls_choice" ADD COLUMN "question_id" integer NOT NULL;
CREATE INDEX "polls_choice_question_id_c5b4b260" ON "polls_choice" ("question_id");
ALTER TABLE "polls_choice" ADD CONSTRAINT "polls_choice_question_id_c5b4b260_fk_polls_question_id" FOREIGN KEY ("question_id") REFERENCES "polls_question" ("id") DEFERRABLE INITIALLY DEFERRED;
COMMIT;
若需执行上述SQL语句,还需执行:
python manage.py migrate
migrate命令会找出所有还没有被应用的迁移文件(Django使用数据库中一个叫做django_migrations的特殊表来追踪哪些迁移文件已经被应用过),并且在你的数据库上运行它们——本质上来讲,就是使你的数据库模式和你改动后的模型进行同步。
使用Django提供的API操作数据库
一旦你建立好数据模型,Django会自动为你生成一套数据库抽象的API,可以让你创建、检索、更新和删除对象。进入Django的Shell环境:python manage.py shell
>>> from polls.models import Question, Choice  # 载入模型

# 查询数据库中是否有问题
>>> Question.objects.all()
<QuerySet []>

# 创建一个新的问题
# 由于在设置的时候开启了时区,所以在生成当前时间的时候选择timezone.now()来替代datetime.datetime.now()
>>> from django.utils import timezone
>>> q = Question(question_text="What's new?", pub_date=timezone.now())

# 保存问题对象到数据库
>>> q.save()

# 保存完毕后会获得一个自增长的ID
>>> q.id
1

# 通过Python属性的方式获取模型的字段
>>> q.question_text
"What's new?"
>>> q.pub_date
datetime.datetime(2018, 2, 2, 12, 58, 49, 648551)

# 修改问题并进行重新保存
>>> q.question_text = "What's up?"
>>> q.save()

# 重新获取问题
>>> Question.objects.all()
<QuerySet [<Question: Question object (1)>]>
在上面的操作中,我们看到已经有数据在数据表中了,但是返回的信息不直观,可以在模型中设置__str__()来使呈现的结果更加直观。修改polls/models.py文件为:
from django.db import models

class Question(models.Model):
    #...
    def __str__(self):
        return self.question_text

class Choice(models.Model):
    #...
    def __str__(self):
        return self.choice_text
另外针对模型我们也可以添加自定义方法,比如在问题上添加是否是最近发布的判断方法(判断发布时间是否在1天以内):
import datetime
from django.db import models
from django.utils import timezone

class Question(models.Model):
    #...
    def was_published_recently(self):
        return self.pub_date >= timezone.now() - datetime.timedelta(days=1)
再次进入shell环境查python manage.py shell:
>>> from polls.models import Question, Choice

# 查看设置的__str__()方法是否起到效果
>>> Question.objects.all()
<QuerySet [<Question: What's up?>]>

# 通过过滤方式查看(具体语法这里不做详细介绍,后面的文章再做整理)
>>> Question.objects.filter(id=1)
<QuerySet [<Question: What's up?>]>
>>> Question.objects.filter(question_text__startswith='What')
<QuerySet [<Question: What's up?>]>

# 通过限制条件进行查询,获取今年发布的问题
>>> from django.utils import timezone
>>> current_year = timezone.now().year
>>> Question.objects.get(pub_date__year=current_year)
<Question: What's up?>

# 当获取的是一个不存在的id是会报错
>>> Question.objects.get(id=2)
Traceback (most recent call last):
    ...
DoesNotExist: Question matching query does not exist.

# 通过主键方式获取信息,下面的语法与Question.objects.get(id=1)相同
>>> Question.objects.get(pk=1)
<Question: What's up?>

# 确定自定义方法是否生效
>>> q = Question.objects.get(pk=1)
>>> q.was_published_recently()
True

# 查询目前问题的选项
>>> q = Question.objects.get(pk=1)

# 看目前的选项
>>> q.choice_set.all()
<QuerySet []>

# 创建选项
>>> q.choice_set.create(choice_text='Not much', votes=0)
<Choice: Not much>
>>> q.choice_set.create(choice_text='The sky', votes=0)
<Choice: The sky>
>>> c = q.choice_set.create(choice_text='Just hacking again', votes=0)

# 选项与问题是存在关联性的,通过关联可以查询到问题
>>> c.question
<Question: What's up?>

# 获取添加的选项
>>> q.choice_set.all()
<QuerySet [<Choice: Not much>, <Choice: The sky>, <Choice: Just hacking again>]>
>>> q.choice_set.count()
3

# 通过问题过滤处选项
>>> Choice.objects.filter(question__pub_date__year=current_year)
<QuerySet [<Choice: Not much>, <Choice: The sky>, <Choice: Just hacking again>]>

# 删除选项
>>> c = q.choice_set.filter(choice_text__startswith='Just hacking')
>>> c.delete()
(1, {'polls.Choice': 1})
开启管理后台
Django比较方便的地方还在于它可以快速的生成一个管理后台。通过对管理后台的配置,可以对模型进行增删改查的操作。
创建超级用户
python manage.py createsuperuser
过程非常的简单,按照指令一步步填写就行。
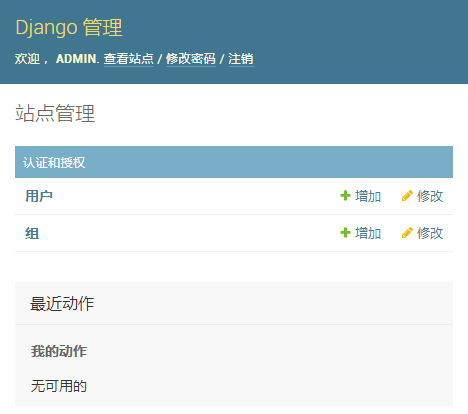
登录管理后台
使用python manage.py runserver启动内部服务器后,即可通过http://127.0.0.1:8000/admin/进行登录。登录后即可看到这样一个界面:
将模型添加到管理后台
默认情况下只有用户管理的模块,并没有针对模型管理的功能,这就要涉及到对polls/admin.py的配置。
最简单的添加模型的方式:
from django.contrib import admin
from .models import Question

admin.site.register(Question)
对模型的呈现进行设置
将模型添加到管理后台后,可以调整增删改查页面的呈现,比如设置各字段的显示顺序:
from django.contrib import admin
from .models import Question

class QuestionAdmin(admin.ModelAdmin):
    fields = ['pub_date', 'question_text']

admin.site.register(Question, QuestionAdmin)
将字段进行分组:
from django.contrib import admin
from .models import Question

class QuestionAdmin(admin.ModelAdmin):
    fieldsets = [
        (None, {'fields': ['question_text']}),
        ('Date information', {'fields': ['pub_date']}),
    ]

admin.site.register(Question, QuestionAdmin)
具体请参考ModelAdmin的设置
添加其他模型到后台管理
通过上面的设置即可对问题进行增删改查。同样你也也可以把选项也这样进行添加:
from django.contrib import admin
from .models import Question, Choice

admin.site.register(Question)
admin.site.register(Choice)
但是并不建议这么做,原因是问题和选项是一对多的,选项的设置最好直接在问题里面进行。解决方案如下:
from django.contrib import admin
from .models import Choice, Question

class ChoiceInline(admin.StackedInline):
    model = Choice
    extra = 3

class QuestionAdmin(admin.ModelAdmin):
    fieldsets = [
        (None, {'fields': ['question_text']}),
        ('Date information', {'fields': ['pub_date']}),
    ]
    inlines = [ChoiceInline]

admin.site.register(Question, QuestionAdmin)
如果要将选项做不同的呈现,可以设置为:
class ChoiceInline(admin.TabularInline):
    #...
添加模型中不存在的内容到列表页,比如:是否是最近发布was_published_recently()。
class QuestionAdmin(admin.ModelAdmin):
    #...
    list_display = ('question_text', 'pub_date', 'was_published_recently')
修改模型
class Question(models.Model):
    #...
    def was_published_recently(self):
        now = timezone.now()
        return now - datetime.timedelta(days=1) <= self.pub_date <= now
    was_published_recently.admin_order_field = 'pub_date'
    was_published_recently.boolean = True
    was_published_recently.short_description = 'Published recently?'
更多内容参见:list_display
另外可以通过设置list_filter和search_fields来设置列表页的过滤项和搜索字段。
list_filter = ['pub_date']
search_fields = ['question_text']
自定义管理后台的呈现样式
默认情况下管理后台采用的是系统自带的模版样式,但是很容易进行自定义设置。
首选需要做的是创建项目模版文件,在项目文件夹(包含manage.py的文件夹)内创建templates文件夹,打开设置文件mysite/settings.py,在TEMPLATES的设置中添加DIRS目录设置:
TEMPLATES = [
    {
        'BACKEND': 'django.template.backends.django.DjangoTemplates',
        'DIRS': [os.path.join(BASE_DIR, 'templates')],
        'APP_DIRS': True,
        'OPTIONS': {
            'context_processors': [
                'django.template.context_processors.debug',
                'django.template.context_processors.request',
                'django.contrib.auth.context_processors.auth',
                'django.contrib.messages.context_processors.messages',
            ],
        },
    },
]
在templates目录下创建admin目录,从django/contrib/admin/templates(Django所在目录的查看方式为:python -c “import django; print(django.__path__)”
)目录下复制admin/base_site.html到目录内。然后修改复制过来的文件即可。其他文件同理。
重新规划网页视图
投票系统应用中,需要如下视图:首页(列表页)、详细页、投票功能、投票结果页。
添加视图
def index(request):
    return HttpResponse("Hello, world. You're at the polls index.")

def detail(request, question_id):
    return HttpResponse("You're looking at question %s." % question_id)

def results(request, question_id):
    response = "You're looking at the results of question %s."
    return HttpResponse(response % question_id)

def vote(request, question_id):
    return HttpResponse("You're voting on question %s." % question_id)
视图与URL绑定
from django.urls import path
from . import views

urlpatterns = [
    # ex:/polls/
    path('', views.index, name='index'),
    # ex:/polls/5/
    path('/', views.detail, name='detail'),
    # ex:/polls/5/results/
    path('/results/', views.results, name='results'),
    # ex:/polls/5/vote/
    path('/vote/', views.vote, name='vote'),
]
完善视图(在视图中引入模型)
from django.http import HttpResponse
from .models import Question

def index(request):
    latest_question_list = Question.objects.order_by('-pub_date')[:5]
    output = ','.join([q.question_text for q in latest_question_list])
    return HttpResponse(output)

# Leave the rest of the views (detail, results, vote) unchanged
创建模版
项目的TEMPLATES设置描述了Django将如何加载并渲染模板。默认的设置文件settings.py配置了一个DjangoTemplates后端,其中将APP_DIRS选项设置为True。按照惯例,DjangoTemplates在INSTALLED_APPS所包含的每个应用的目录下查找名为”templates”子目录。因此即使我们不像教程中管理后台那样去修改DIRS,Django也可以找到应用的模版。
我们可以将所有的模板聚在一起,放在一个大的模板目录下,且可以运行地很好。然而,我们的这个模板属于投票应用,不像我们在先前教程中创建的管理站点模板,我们将把它们放在应用的模板目录下(polls/templates)而不是项目模板目录下(templates)。
在刚创建的templates目录中,创建另外一个目录polls,并在其中创建一个文件index.html。换句话讲,你的模板应该位于polls/templates/polls/index.html。由于app_directories模板加载器按照上面描述的方式工作,在Django中你可以简单地用polls/index.html引用这个模板。
{% if latest_question_list %}
-
{% for question in latest_question_list %}
- {{ question.question_text }} {% endfor %}
No polls are available.
{% endif %}绑定模版和视图
from django.http import HttpResponse
from django.template import loader
from .models import Question

def index(request):
    latest_question_list = Question.objects.order_by('-pub_date')[:5]
    template = loader.get_template('polls/index.html')
    context = {
        'latest_question_list': latest_question_list,
    }
    return HttpResponse(template.render(context, request))
使用render()精简绑定
from django.shortcuts import render
from .models import Question

def index(request):
    latest_question_list = Question.objects.order_by('-pub_date')[:5]
    context = {'latest_question_list': latest_question_list}
    return render(request, 'polls/index.html', context)
设置404错误页面
from django.http import Http404
from django.shortcuts import render
from .models import Question

# ...
def detail(request, question_id):
    try:
        question = Question.objects.get(pk=question_id)
    except Question.DoesNotExist:
        raise Http404("Question does not exist")
    return render(request, 'polls/detail.html', {'question': question})
get_object_or_404()精简404页面:
from django.shortcuts import get_object_or_404, render
from .models import Question

# ...
def detail(request, question_id):
    question = get_object_or_404(Question, pk=question_id)
    return render(request, 'polls/detail.html', {'question': question})
创建polls/detail.html
{{ question.question_text }}
-
{% for choice in question.choice_set.all %}
- {{ choice.choice_text }} {% endfor %}
移除模版中写死的URL
打开polls/index.html,可以看到链接是写死的,为防止后期更改url路由,需要进行修改:
通过{% url %}模版标签进行设置:
url.py中的name值即为{% url %}的模版tag,即URL的名称:
...
path('/', views.detail, name='detail'),
...
为URL名称添加命名空间
在正常情况下Django一个项目有多个应用,定于url名称的时候可能会出现重复的现象,解决方案是给url名称加上命名空间。方法比较简单,在polls/urls.py文件中设置app_name:
from django.urls import path
from . import views

app_name='polls'
urlpatterns=[
path('', views.index, name='index'),
path('/', views.detail, name='detail'),
path('/results/', views.results, name='results'),
path('/vote/', views.vote, name='vote'),
]
然后再对模板进行修改,{% url %}修改为:
创建投票详情页面
投票详情页面主要的功能是进行投票,核心是提交表单。首先先来修改polls/detail.html模板:
{{ question.question_text }}
{% if error_message %}{{ error_message }}
{% endif %}
{% csrf_token %}主要是防止csrf的黑客攻击,每个表单一般都会使用,在这里先不做详细介绍。
创建投票功能
在polls/urls.py新建url规则:
path('/vote/', views.vote, name='vote'),
在视图中创建vote()方法:
from django.shortcuts import get_object_or_404, render
from django.http import HttpResponseRedirect, HttpResponse
from django.urls import reverse
from .models import Choice, Question

#...
def vote(request, question_id):
    question = get_object_or_404(Question, pk=question_id)
    try:
        selected_choice = question.choice_set.get(pk=request.POST['choice'])
    except (KeyError, Choice.DoesNotExist):
        #重现显示投票表单
        return render(request, 'polls/detail.html', {
            'question': question,
            'error_message': "You didn't select a choice.",
        })
    else:
        selected_choice.votes += 1
        selected_choice.save()
        #重定向至投票成功页面,防止刷新或返回的时候重复提交。
        return HttpResponseRedirect(reverse('polls:results', args=(question.id,)))
创建投票结果页
先创建好视图:
from django.shortcuts import get_object_or_404, render

def results(request, question_id):
    question = get_object_or_404(Question, pk=question_id)
    return render(request, 'polls/results.html', {'question': question})
再创建好模板polls/results.html
{{ question.question_text }}
-
{% for choice in question.choice_set.all %}
- {{ choice.choice_text }}--{{ choice.votes }} vote{{ choice.votes|pluralize }} {% endfor %}
在配置url规则:
path('/results/', views.results, name='results'),
重构,让代码更加精简
上面的步骤已经完成了基础的功能,为了使得代码更加方便进行后期维护,需要对代码进行重构,对部分代码进行抽象。
改进URLconf
将:
from django.urls import path
from . import views

app_name = 'polls'
urlpatterns = [
    path('', views.index, name='index'),
    path('/', views.detail, name='detail'),
    path('/results/', views.results, name='results'),
    path('/vote/', views.vote, name='vote'),
]
修改为:
from django.urls import path
from . import views

app_name = 'polls'
urlpatterns = [
    path('', views.IndexView.as_view(), name='index'),
    path('/', views.DetailView.as_view(), name='detail'),
    path('/results/', views.ResultsView.as_view(), name='results'),
    path('/vote/', views.vote, name='vote'),
]
变化的内容:
- <question_id>变成了<pk>
- detail变成了views.DetailView.as_view()
改进views
将原先的:
from django.shortcuts import get_object_or_404, render
from django.http import HttpResponseRedirect
from django.urls import reverse
from .models import Choice, Question


def index(request):
    latest_question_list = Question.objects.order_by('-pub_date')[:5]
    context = {'latest_question_list': latest_question_list}
    return render(request, 'polls/index.html', context)

def detail(request, question_id):
    question = get_object_or_404(Question, pk=question_id)
    return render(request, 'polls/detail.html', {'question': question})

def vote(request, question_id):
    question = get_object_or_404(Question, pk=question_id)
    try:
        selected_choice = question.choice_set.get(pk=request.POST['choice'])
    except (KeyError, Choice.DoesNotExist):
        # 重现显示投票表单
        return render(request, 'polls/detail.html', {
            'question': question,
            'error_message': "You didn't select a choice.",
        })
    else:
        selected_choice.votes += 1
        selected_choice.save()
        # 重定向至投票成功页面,防止刷新或返回的时候重复提交。
        return HttpResponseRedirect(reverse('polls:results', args=(question.id,)))

def results(request, question_id):
    question = get_object_or_404(Question, pk=question_id)
    return render(request, 'polls/results.html', {'question': question})
修改为:
from django.shortcuts import get_object_or_404, render
from django.http import HttpResponseRedirect
from django.urls import reverse
from django.views import generic
from .models import Choice, Question


class IndexView(generic.ListView):
    template_name = 'polls/index.html'
    context_object_name = 'latest_question_list'

    def get_queryset(self):
        """Return the last five published questions."""
        return Question.objects.order_by('-pub_date')[:5]


class DetailView(generic.DetailView):
    model = Question
    template_name = 'polls/detail.html'


class ResultsView(generic.DetailView):
    model = Question
    template_name = 'polls/results.html'

def vote(request, question_id):
    question = get_object_or_404(Question, pk=question_id)
    try:
        selected_choice = question.choice_set.get(pk=request.POST['choice'])
    except (KeyError, Choice.DoesNotExist):
        # 重现显示投票表单
        return render(request, 'polls/detail.html', {
            'question': question,
            'error_message': "You didn't select a choice.",
        })
    else:
        selected_choice.votes += 1
        selected_choice.save()
        # 重定向至投票成功页面,防止刷新或返回的时候重复提交。
        return HttpResponseRedirect(reverse('polls:results', args=(question.id,)))
主要变化的内容:将页面视图由方法变成了类,我们在这里使用两个通用视图ListView和DetailView。这两个视图分别抽象”显示一个对象列表”和”显示一个特定类型对象的详细信息页面”这两种概念。
- 每个通用视图需要知道它将作用于哪个模型,由model属性提供。
- DetailView期望从URL中捕获名为”pk”的主键值,因此我们把polls/urls.py中question_id改成了pk以使通用视图可以找到主键值。
默认情况下,通用视图 DetailView 使用一个叫做 <appname>/<modelname>_detail.html 的模板。在例子中,它将使用 “polls/question_detail.html” 模板。template_name 属性是用来告诉 Django 使用一个指定的模板名字,而不是自动生成的默认名字。我们也为 results 列表视图指定了 template_name,这确保 results 视图和 detail 视图在渲染时具有不同的外观,即使它们在后台都是同一个 DetailView。类似地,ListView 使用一个叫做 <appname>/<modelname>_list.html 的默认模板;我们使用 template_name 来告诉 ListView 使用我们自己已经存在的 “polls/index.html” 模板。
在之前的教程中,提供模板文件时都带有一个包含 question 和 latest_question_list 变量的 context。对于 DetailView,question 变量会自动提供,对于 ListView,自动生成的 context 变量是 question_list。为了覆盖这个行为,我们提供 context_object_name 属性,表示我们想使用 latest_question_list。作为一种替换方案,你可以改变你的模板来匹配新的 context 变量。
编写自动化测试
创建测试代码
Question 在最近一天发布,Question.was_published_recently() 方法返回 True(这是对的),但是如果 Question 的 pub_date 字段是在未来,它还返回 True(这肯定是不对的)。创建第一个自动化测试的代码,打开 polls/tests.py 文件:
import datetime
from django.utils import timezone
from django.test import TestCase
from .models import Question


class QuestionModelTests(TestCase):

    def test_was_published_recently_with_future_question(self):
        """
        was_published_recently() returns False for questions whose pub_date
        is in the future.
        """
        time = timezone.now() + datetime.timedelta(days=30)
        future_question = Question(pub_date=time)
        self.assertIs(future_question.was_published_recently(), False)
运行测试代码
python manage.py test polls
执行后返回如下信息:
D:\mysite>python manage.py test polls
Creating test database for alias 'default'...
System check identified no issues (0 silenced).
F
======================================================================
FAIL: test_was_published_recently_with_future_question (polls.tests.QuestionModelTests)
----------------------------------------------------------------------
Traceback (most recent call last):
  File "D:\mysite\polls\tests.py", line 16, in test_was_published_recently_with_future_question
    self.assertIs(future_question.was_published_recently(), False)
AssertionError: True is not False

----------------------------------------------------------------------
Ran 1 test in 0.002s

FAILED (failures=1)
Destroying test database for alias 'default'...
代码执行后中间经过了如下几个过程:
- 程序自动寻找了 test.TestCase 的子类
- 程序自动运行了以 test 的方法
- 运行前创建了临时的数据库,运行后将临时库进行了销毁
修复错误后重新执行
def was_published_recently(self):
    now = timezone.now()
    return now - datetime.timedelta(days=1) <= self.pub_date <= now
重新运行,后获得如下结果:
D:\mysite>python manage.py test polls
Creating test database for alias 'default'...
System check identified no issues (0 silenced).
.
----------------------------------------------------------------------
Ran 1 test in 0.002s

OK
Destroying test database for alias 'default'...
在测试类中添加各种场景
为保证测试的完整性,需要测试不同场景下程序是否能够正确处理。
def test_was_published_recently_with_old_question(self):
    """
    发布时间大于1天的场景
    """
    time = timezone.now() - datetime.timedelta(days=30)
    old_question = Question(pub_date=time)
    self.assertEqual(old_question.was_published_recently(), False)

def test_was_published_recently_with_recent_question(self):
    """
    发布时间小于1天的场景
    """
    time = timezone.now() - datetime.timedelta(hours=1)
    recent_question = Question(pub_date=time)
    self.assertEqual(recent_question.was_published_recently(), True)
测试视图
Django测试客户端
Django 提供了一个测试客户端来模拟用户和代码的交互。我们可以在 tests.py 甚至在 shell 中使用它。我们以 shell 为例,首先进入 shell 环境:
python manage.py shell
先设置测试环境:
>>> from django.test.utils import setup_test_environment
>>> setup_test_environment()
setup_test_environment()会安装一个模板渲染器,可以使我们来检查响应的一些额外属性比如,比如相应上下文response.context。注意,这种方法不会建立一个测试数据库,所以以下命令将运行在现有的数据库上。
下一步我们需要导入测试客户端类(在之后的tests.py中,我们将使用django.test.TestCase类,它具有自己的客户端,将不需要导入这个类):
>>> from django.test import Client
>>> client = Client()
这些都做完之后,我们可以让这个客户端来为我们做一些事:
>>> response = client.get('/')
NotFound: /
>>> response.status_code
404
>>> #我们想要获取的首页是'/polls/',可以将请求修改为client.get('/polls/')
>>> #或者使用reverse()方法来动态生成url
>>> from django.urls import reverse
>>> response = client.get(reverse('polls:index'))
>>> response.status_code
200
>>> response.content
b'\n<ul>\n\n<li><a href="/polls/1/">What's up?</a></li>\n\n</ul>\n'
>>> response.context['latest_question_list']
[<Question: Who is your favorite Beatle?>]
改进我们的视图
默认情况下投票的列表显示了还没有发布的投票(即pub_date的时间在未来的投票)。需要进行修复。
修改polls/views.py中的IndexView下的get_queryset方法并让它将日期与timezone.now()进行比较。
from django.utils import timezone

class IndexView(generic.ListView):
    template_name = 'polls/index.html'
    context_object_name = 'latest_question_list'

    def get_queryset(self):
        """Return the last five published questions."""
        return Question.objects.filter(pub_date__lte=timezone.now()).order_by('-pub_date')[:5]
测试新的视图
打开polls/tests.py导入reverse:
from django.urls import reverse
创建一个创建问题的函数,同时新建一个测试类
def create_question(question_text, days):
    """
    Creates a question with the given `question_text` published the given
    number of `days` offset to now (negative for questions published
    in the past, positive for questions that have yet to be published).
    """
    time = timezone.now() + datetime.timedelta(days=days)
    return Question.objects.create(question_text=question_text,
    pub_date=time)

class QuestionViewTests(TestCase):
    def test_index_view_with_no_questions(self):
        """
        If no questions exist, an appropriate message should be displayed.
        """
        response = self.client.get(reverse('polls:index'))
        self.assertEqual(response.status_code, 200)
        self.assertContains(response, "No polls are available.")
        self.assertQuerysetEqual(response.context['latest_question_list'], [])

    def test_index_view_with_a_past_question(self):
        """
        Questions with a pub_date in the past should be displayed on the
        index page.
        """
        create_question(question_text="Past question.", days=-30)
        response = self.client.get(reverse('polls:index'))
        self.assertQuerysetEqual(
            response.context['latest_question_list'],
            ['<Question: Past question.>']
        )

    def test_index_view_with_a_future_question(self):
        """
        Questions with a pub_date in the future should not be displayed on
        the index page.
        """
        create_question(question_text="Future question.", days=30)
        response = self.client.get(reverse('polls:index'))
        self.assertContains(response, "No polls are available.",
        status_code=200)
        self.assertQuerysetEqual(response.context['latest_question_list'], [])

    def test_index_view_with_future_question_and_past_question(self):
        """
        Even if both past and future questions exist, only past questions
        should be displayed.
        """
        create_question(question_text="Past question.", days=-30)
        create_question(question_text="Future question.", days=30)
        response = self.client.get(reverse('polls:index'))
        self.assertQuerysetEqual(
            response.context['latest_question_list'],
            ['<Question: Past question.>']
        )

    def test_index_view_with_two_past_questions(self):
        """
        The questions index page may display multiple questions.
        """
        create_question(question_text="Past question 1.", days=-30)
        create_question(question_text="Past question 2.", days=-5)
        response = self.client.get(reverse('polls:index'))
        self.assertQuerysetEqual(
            response.context['latest_question_list'],
            ['<Question: Past question 2.>', '<Question: Past question 1.>']
        )
测试 DetailView
即使未来发布的 Question 不会出现在 index 中,如果用户知道或者猜出正确的 URL 依然可以访问它们。所以我们需要给 DetailView 添加一个这样的约束:
class DetailView(generic.DetailView):
    model = Question
    template_name = 'polls/detail.html'

    def get_queryset(self):
        """Excludes any questions that aren't published yet."""
        return Question.objects.filter(pub_date__lte=timezone.now())
当然,我们将增加一些测试来检验 pub_date 在过去的 Question 可以显示出来,而 pub_date 在未来的不可以:
class QuestionIndexDetailTests(TestCase):
    def test_detail_view_with_a_future_question(self):
        """
        The detail view of a question with a pub_date in the future should
        return a 404 not found.
        """
        future_question = create_question(question_text='Future question.',
        days=5)
        response = self.client.get(reverse('polls:detail',
        args=(future_question.id,)))
        self.assertEqual(response.status_code, 404)

    def test_detail_view_with_a_past_question(self):
        """
        The detail view of a question with a pub_date in the past should
        display the question's text.
        """
        past_question = create_question(question_text='Past Question.',
        days=-5)
        response = self.client.get(reverse('polls:detail',
        args=(past_question.id,)))
        self.assertContains(response, past_question.question_text,
        status_code=200)
自定义应用的外观
首先在你的 polls 中创建一个 static 目录。Django 将在那里查找静态文件,这与 Django 在 polls/templates/ 中寻找对应的模板文件的方式是一致的。~~~~
Django 的STATICFILES_FINDERS 设置包含一个查找器列表,它们知道如何从各种源找到静态文件。其中默认的一个是 AppDirectoriesFinder,像在刚刚 polls 中创建的那个项目查找方式一样,它会在每个INSTALLED_APPS下查找”static”子目录。管理站点也为它的静态文件使用相同的目录结构。
在你刚刚创建的 static 目录中,创建另外一个目录 polls 并在它下面创建一个文件 style.css。换句话讲,你的样式表应该位于 polls/static/polls/style.css。因为 AppDirectoriesFinder 静态文件查找器的工作方式,你可以通过 polls/style.css 在 Django 中访问这个静态文件,与你如何访问模板的路径类似。
静态文件的命名空间
与模板类似,我们可以将静态文件直接放在 polls/static(而不是创建另外一个 polls 子目录),但实际上这是一个坏主意。Django 将使用它所找到的第一个符合要求的静态文件的文件名,如果在你的不同应用中存在两个同名的静态文件,Django 将无法区分它们。我们需要告诉 Django 该使用其中的哪一个,最简单的方法就是为它们添加命名空间。也就是说,将这些静态文件放进以它们所在的应用的名字命名的另外一个目录下。
将下面的代码放入样式表中 (polls/static/polls/style.css):
li a {
color: green;
}
下一步,在 polls/templates/polls/index.html 的顶端添加如下内容:
{% load staticfiles %}
<link rel="stylesheet" type="text/css" href="{% static 'polls/style.css' %}" />
{% load staticfiles %} 从 staticfiles 模板库加载 {% static %} 模板标签。{% static %} 模板标签会生成静态文件的绝对 URL。
这就是你在开发过程中所需要对静态文件做的所有处理。重新加载 http://localhost:8000/polls/,你应该会看到 Question 的超链接变成了绿色,这意味着你的样式表被成功导入。